Welcome!

In February of 2009, my husband and I bought our first home located on a few acres in Johnson, Vermont. We live here with our dog, Ollie, two cats: Elvis and Atticus, six Nigerian Dwarf goats: May, Chutney, Poppy, Juniper, Willow, and Jokers Wild, and about fifteen laying hens. And to top it all off we welcomed our daughter, Isabel, into the world on January 11th, 2011.

We're slowly updating our 1850's farmhouse while steadily working towards a healthy, meaningful, self-sufficient life together.

This blog details our endeavors along with our successes and failures- all in good fun. Thanks for stopping by, hope to see you again soon!

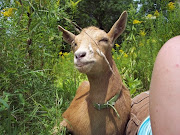
May

May
May and I enjoying some sunshine

Followers

Dining Renovation- Part 1

Lovingly Posted by Melissa Tuesday, September 28, 2010 0 comments

A couple weeks ago, demolition of our house moved to a whole new level, literally.  We are getting ready to install our woodstove in a couple weeks which means we have to prepare walls and a hearth.  Piggie-backing that project is the renovation of our dining room.  So, after stopping over at Johnson Farm and Garden for some chicken feed and a quick dinner of veggies and beans with spinach gnocchi, Kyle broke out the reciprocating saw and crow bar and got to work on the wall dividing our dining room from our living room.


*This is a picture of our dining room as it was when we bought the house back in February of 2009- we had since torn up the carpet and stained the hardwood flooring that was revealed below.*

I was quarantined to either the yard or our bedroom because who really knows what could be lurking in those walls, and we don't want to risk the health of our baby.  Kyle donned one of our ventilator masks, hung up some plastic in an effort to keep the dust corralled, and within a couple hours he had successfully opened up the space.  We were shocked to find out that the studs within that wall were there purely to aid in the hanging of the lath and plaster.  Thats right, there was no header supporting the floor above.  You really never know what you're going to find in old houses, and this one has really taken the cake so far.

Kyle removed those few studs last week (since they weren't structural there was no need to keep them) so we could get working on our hearth pad and the wall behind where our woodstove will go and moved the outlet and switch to a new wall so we could hook the power back up.  Then the fun began- I watched as my husband gleefully ripped down the drop ceiling that we've hated ever since we moved in.  Who puts a drop ceiling and a flourescent light in a dining room!?  He uncovered the handiwork of our electrician and got a good look at the condition of the plaster and lath ceiling- it looked like crap, but still an improvement if you ask me! 


Last weekend he moved the wiring off of the ceiling and disconnected a few lines to outlets we didn't need right now.  And the demo officially began.  We hired out a local guy to help Kyle with ripping down the plaster and lath since I would be no help at all.  Luckily, in the stripping of the ceiling, they uncovered a massive header where the house originally ended and the new addition began.  So it wasn't just hanging there in space as we originally imagined.  Kyle and Saul we able to get the rest of the plaster and lath stripped by the end of last week and we were finally able to clean up and remove the plastic sheeting (trust me, walking outside to get to the kitchen was getting REAL old).

Over this past weekend we took on a project that we had originally planned on paying someone to do.  We drove up to Montgomery Friday night to retrieve the sliding glass door from my Mom's house that she no longer wanted and set our eyes on getting it installed by the end of the weekend.  We had three doors in the front of our long house but no doors going out to the back yard.  We've been wanting to get a door installed so we could quickly and easily get to the back yard and the garden below but never got around to getting quotes for the installation.  Last week Kyle decided he wanted to tackle it himself and I, the ever-supportive wife, went along for the ride.  I'll fill you in on that one next time.

Our Hearth- Part 1

Lovingly Posted by Melissa Thursday, September 23, 2010 1 comments

Saturday was a busy day of home renovating which, luckily, kept us sneaking back outside into the welcoming sunshine that we've missed for what seems like an eternity.  It was the kind of day that leaves you tired and sore where you just feel like huddling under the down comforter with a cup of hot chocolate and a good book by the end of the day.  We had spent the morning buying supplies to build our hearth pad for our wood stove.  The plan is to move it in this Friday evening with the help of a few friends and more than a couple beers followed by a hearty, homemade dinner made by yours truly.  As I am carrying our little bundle of joy I will not be partaking in the moving of the wood stove and the drinking of the beer- a fair tradeoff if I do say so myself.

We returned home, had a quick brunch of eggs and pork sausage (both from our farm which always makes my appetite a little more ravenous), and got to work on the hearth pad.  Kyle cut up the 3/4" plywood to a four by four foot square according to the specs provided by our owners manual for our stove and we laid it in place.  **All hearth pad sizes depend on your stove, so if you're looking to tackle this project, be sure and do your research first.**  Once we had it where we wanted it I screwed it down every 4-6 inches with leftover hardibacker screws from when we tiled our bathroom.

While Kyle cut up the cement board I cleaned off our four stones that we bought from the local landscaping place.  They had road dust and red clay on them that needed to be removed and allowed to dry before we attempt to secure them in place on top of the cement board.  Tile would have been less expensive, but considering the R value that these 2" thick stones add, we figured the added safety and thermal mass was well worth the extra $50.  I began cleaning them off just with our hose and my bare hands.  Well, I can tell you now that isn't a good idea.  Halfway through cleaning off the four stones I realized that my fingertips were being slowly sanded down by the bluestone, so I grabbed the pushbroom to scrub the clay off, which worked much better anyways.


While the stones were drying in the sunshine I secured the cement board atop the plywood with more of the hardibacker screws- again, every 4-6 inches, to be sure there would be no flex when we lay down the thinset and stone.  Its amazing how this normally simple project wore me out now that I'm a little less able to bend at the waist.  My baby bump kept me shifting from position to position, searching for that perfect combination of leverage and abdominal comfort.  But I'm convinced that when it comes to working on the floor, there is no such combination when you're pregnant.


Once the cement board was down and the stones were dry, Kyle brought them into the house and we began laying them down so we could decide on their placement.  They are approximately two by two foot stones, so the combinations were fairly limited, which was fine with Kyle since they weighed a fair bit.  We decided on placement and I marked each stone on the back with a number and an X in the corner that would be in the center of the pad so we would know where it belonged.  We rested them on a few towels not far from the hearth pad and called it a day.

They've Arrived!

Lovingly Posted by Melissa Tuesday, September 21, 2010 3 comments

Saturday evening we heard some peeping from the hayloft and sure enough the eggs had hatched!!  We ended up with seven new chicks.  This spot in the hayloft had been the favorite spot for all the hens to lay their eggs so we got quite a variety from our broody Dominique.  You can only see one of the chicks in this picture here- they were just born when I took this picture and most were still hiding underneath the hen.


As soon as we saw them up there we grabbed our chick-sized water font (the rubber tub we had up there for the hen just wasn't going to cut it for obvious reasons) and barricaded them in so they couldn't fall out if they wandered.  But last night we moved them to the ground in front of our house with a small house and a fenced-in yard where they could wander, eat grass, and be safe with their "mama" hen.  Hopefully I'll get a chance to take some more pictures tonight when they're out and about because when we moved them last night they were either inside their shelter or huddled underneath the Dominique most of the time.

Nursery Renovation

Lovingly Posted by Melissa Thursday, September 16, 2010 3 comments

My dear friends, there are so many home renovation projects I need to post about its not even funny.  Almost the entire second floor of our house is finished and I have neglected to say anything about it!  So, in my efforts to get caught up, here is the lowdown on our renovation of our nursery!

Back in February of 2009, when we bought our house, we were faced with a lovely old farmhouse with not-so-lovely rooms.  There was either floor to floor carpet (even indoor/outdoor carpet in the dining room), or congoleum throughout the house.  On all other surfaces (yes that includes the ceilings) there was layer upon layer of wallpaper, minus the dining room that has a lovely drop ceiling.  The night we closed on our house we began renovations- we ripped down wallpaper and pulled up congoleum flooring and we've been going ever since.

One of our favorite rooms, just because it provided such a good laugh, was a little room located immediately at the top of our stairs.  We affectionately referred to it as "the carpet sample room", and you can see from the picture why; it was floored with 12x12 carpet samples, stapled or nailed to the floor.  Unfortunately, as a condition for our loan through VHFA, we were required to rip up the carpet samples and lay down new carpet into that room.  We weren't thrilled at all, we hate carpet, but because the floor was a little less than perfect we decided that it would just be easier to have carpet installed rather than level the floor to lay down wood anyway.

We began by ripping out everything- unfortunately I failed to take pictures of this process- from floor to ceiling.  After getting the new wiring finished (we had to have the whole house re-wired because it had the old knob and tube wiring) and reinsulating the whole room, we started our first sheetrock project.  It is far from perfect, slanted walls and irregular stud-depth made for quite a challenge, but we finished it and had the carpet installed.  Amazingly, once it was in, I loved it.  For a year we left it alone, kind of a spare room where we stored random junk that we didn't want out in the workshop or down in the basement.  But back in March we discovered we'd be welcoming a new member to the family and decided we'd best get things in order.

The room seemed dark due to the wall of wood paneling that we left up, so Kyle framed in the wall, added more insulation, and hung sheetrock to cover it.  The result was dramatic, it suddenly felt clean and airy. 

We picked out a light green paint for the walls and enlisted my Mom to help paint a mural on the lower portion of the walls. 

We hung a chair rail to divide the mural from the rest of the wall and put up the rest of the trim.  We were lucky to have been given a crib, as well as some other baby gear, from my cousin Jill and her husband, Tim.

The highchair is a handmade gift from my uncle, Jeff, when he came up for our wedding in June of 2009.

The only thing left to do is refinish the dresser which I will be turning into a changing table, install a new light, and generally get some additional pieces of furniture and art to flesh out the room.  I'll let you in on a little secret, I already refinished the dresser- I'll share that mini-makeover with you soon I promise!

Brooding

Lovingly Posted by Melissa Tuesday, September 7, 2010 0 comments

Hey folks.  So apparently I'm not the only one working on new additions to the family.  After the arrival of our friend's roosters there was, apparently, some hanky panky with our hens.  When we went away for a long weekend to Washington DC last month we had a Black Australorp brooding in one of our nesting boxes.  We were so excited!  After loosing so many chickens to those darned pigs we were looking forward to having some "freebies" to add to our flock.

Unfortunately, when we returned we found that one of the neighborhood kids had stopped in and put all our eggs in a bucket for us.  So we lost those and the hen hasn't shown any interest in brooding since.  I was very disappointed because those Australorps are some pretty and birds and they lay big eggs.  But, it just wasn't meant to be I guess.

Lucky for us, hiding up in the hayloft, one of the Dominiques has been sitting on a pile of eggs for a couple weeks now.  She is very diligent and I'm hoping we'll end up with some new babies in another week or two.  The timing probably could have been better as the days are getting shorter and the temperatures are getting a little lower, but if need be we can move them into a seperate area where we can have a heat lamp set up.  As it is they will have to be seperated from the rest of the flock until they are a lot more mobile.  I don't want to run the risk of the babies being attacked by the other chickens.

Exciting stuff!

The Deere is gone.

Lovingly Posted by Melissa Wednesday, September 1, 2010 2 comments

Well folks- our lawn is pretty upset right now.  The grass hasn't been mowed in ages, some of the blades are yellowing...its not a pretty sight.  We had been having trouble with the lawn tractor all summer, it kept breaking belts.  Granted, the sucker wasn't in the best of shape, but when it mowed it MOWED.  The thing that really disappointed us was that the main reason we got a lawn tractor was for the snowblower attachment.  We figured we could save ourselves some cash if we could just clear our driveway ourselves.  Well, it worked, we didn't pay anyone to plow our driveway, but we ended up shoveling it more often than not.

So, after a year long love/hate relationship with our 214 (we bought it used from a fella we spotted on Craigslist) we decided to break up.  Kyle posted it and two days later it was sold- luckily the guy who bought it knows all about the crappy snowblowing and the issues we have with the mower- and he still wanted it.  So now we're mower-less.  Our thought is that maybe, just maybe, we could get away with paying someone to mow our lawn once this month and maybe we can let it go for the rest of the year.  Then, we'll look for an affordable walk-behind snowblower (our driveway is just too big to shovel and seeing as I'll either be massively pregnant or taking care of a newborn this winter, I don't forsee shoveling in my near future).

While we know what we want to do regarding the snow/driveway, we are completely unsure what to do next year for our grass.  We could get away with mowing just the upper lawn if we had enough animals to keep the grass down in the lower section.  And, lets face it, a handful of little goats and a flock of chickens don't really have the capability to knock down almost three acres of grass.  So the question is- do we want to invest in some sheep?  I'd love to get couple sheep so I could make some handspun yarn, but I'm not sure if it makes much sense financially.  Maybe a small horse?  One vote for the horse....one vote for a dirtbike....damn.

So the search is on.  We're seriously considering getting a reel mower so we don't have to worry about the gas and the noise (and lets face it, there are fewer things that can break on a non-motorized mower), but that definitely doesn't solve the whole dilemma.  Does anyone have any suggestions?  Perhaps there are some options we haven't come up with yet?