Welcome!

In February of 2009, my husband and I bought our first home located on a few acres in Johnson, Vermont. We live here with our dog, Ollie, two cats: Elvis and Atticus, six Nigerian Dwarf goats: May, Chutney, Poppy, Juniper, Willow, and Jokers Wild, and about fifteen laying hens. And to top it all off we welcomed our daughter, Isabel, into the world on January 11th, 2011.

We're slowly updating our 1850's farmhouse while steadily working towards a healthy, meaningful, self-sufficient life together.

This blog details our endeavors along with our successes and failures- all in good fun. Thanks for stopping by, hope to see you again soon!

May

May
May and I enjoying some sunshine

Followers

Kitchen Progress!

Lovingly Posted by Melissa Wednesday, August 17, 2011 2 comments

For those of you blissfully unaware that we haven't been living in our house for the past two months you may be surprised to hear that we are BACK.  That's right!  Home sweet home...

Things have been steadily progressing in our kitchen.  Oh yes.  The KITCHEN.  Remember this beauty?


Loverly isn't she?  What could possibly make us want to change anything about this?  Well...lets just say it was a bit chilly in the winter and I'll leave it at that.

Kyle began demolition over his vacation about two months ago and, with the help of his step-brother, the room was rapidly stripped down to bare studs.  We were a little bummed that we weren't able to salvage the cabinets to use as storage in the workshop but they came down in pieces with one swift stroke of the hammer.  So into the pile of scrap wood they went.

Only a small amount of insulation was discovered behind the old drywall.  This was no surprise.  And after lots of hemming and hawing we decided to rip up the floor too and discovered that not only was there NO insulation, but no vapor barrier from the ground.  We were lucky that there was no rot, and the ground below was perfectly dry despite the rainy weather we had been having.  We breathed a sigh of relief (because when it comes to demo in a house as old as ours you almost always run into something unexpectedly unpleasant) and continued along our merry way.  I say 'we' in the very loose sense- Kyle did the grunt work.  I took care of the baby.  I say we're even, therefor I say 'we'.

The past few years we have lived in our house we have endured freezing cold floors in the kitchen every winter.  Not that it was that much of a big deal.  The kitchen was my least favorite room of the house, with its mint green cabinets and stickers of fruit (?).  So while I didn't spend much more time in there than I needed to for aesthetic reasons, I'd have to go in with my muck boots on just to avoid frost bite on my toes.  Therefor, only did we need to insulate the walls from drafts, but the floors as well.  Kyle laid down a vapor barrier and then filled the crawl space with insulation.  Here it is in progress:


In a single week the boys were able to get the subfloor back down over the joists as well as additional supports to keep the floor from flexing as it used to.  We were left with a skeleton of a room.  A blank slate.  Just the way I like it.  I drew up half a dozen floor plans for our future kitchen, some Kyle liked, some he hated, and vice versa.  We decided what we'd really like is an island to increase the work space, maybe one with the oven built in so you could cook and socialize with people at the same time.  But the reality that ovens take up a lot of space quickly beat down that plan.  Its amazing how something can feel so open and airy on paper but as soon as you draw out the layout on the floor its a totally different monster.  So I went back to the drawing board.


Over the next few weeks Kyle managed to not only install a new, bigger window over where the sink would be, he was able to run all the new wiring, install recessed lights, and after about a week of waiting we had a guy come in to do blown-in insulation.  It wasn't really in our budget (trust me that stuff isn't cheap) but we decided that since the room gets a lot of wind and is surrounded by uninsulated areas (the work shop next to it and above it) we couldn't afford to be cheap about it.


Over the past month there has been amazing progress made.  Enough so that we could move back into our house today, so that must mean something.  Unfortunately we're still washing dishes in our bathroom sink which isn't ideal, but hey, one thing at a time right?  Stick around folks, I'll have some great pictures to share next time!

Hooray Veggies!!

Lovingly Posted by Melissa Wednesday, July 20, 2011 0 comments

After two unsuccessful years with my garden at the bottom of the hill I am FINALLY seeing the light at the end of the tunnel.  Last year, for my birthday, my Mom built me a handful of raised beds next to the house on our south-facing lawn that previously went unused.  It is a lovely little spot of land in front of our picture window and overlooking the river and a farm across the road.  After a second year of disappointment in our garden, Kyle and I had decided to move it to its current home to make it easier to water.  At its previous location we would have to string along five or six hoses around the house and down the hill (the previous owner of our house, an elderly woman, would carry watering cans back and forth...amazing).

My dearest Mom is a very handy woman and she quickly built the raised beds along with a small, hinged platform to hide the access for our septic tank.  This spring, Kyle filled the beds starting with some empty grain bags to try to keep weeds at bay, followed by some goat and chicken manure and straw from the barn, and finally soil.  I began planting with just one bed for lettuce and broccoli and a bed for spinach.  The lettuce and broccoli were looking pretty sad the day I put them in the ground.  Even the kid across the street, a sweet boy who spends a lot of time over at our farm, commented that he thought they were going to die.

Luckily they pulled through and even flourished!  I've been up to my ears in romaine and have resorted to feeding it to the goats.  Note to self: no two people need thirty heads of romaine.  Although, I never pull them out of the ground, I just keep cutting them any time I want some salad so they keep growing back.

Unfortunately my spinach didn't do as well.  I think the problem was that I was using seed left over from last year and the packet might have gotten a bit wet before sitting through the winter in our workshop.  So I bought some new seed and replanted, so far that is the least successful plant in the garden which really is frustrating because I love spinach and we eat a lot of it.  I'm still working on it.

Finally a few months ago I got the rest of the garden in.  Acorn squash, summer squash, peas, beans, carrots, mustard greens, tomatoes, cucumbers, and celery all went into the ground and have been flourishing ever since.  I had a small problem with some cucumber beetles (not sure why my chickens weren't more on top of that) which ate a few of my acorn squash plants.  But luckily I had planted too many in the raised bed anyway so they really did me a favor, as much as I hate to admit it.

I think one of the main reasons the garden is doing so well this year is that I can look out the windows and see  whats going on.  I can walk around the gardens after or before work and see that things need to be weeded- so I take ten minutes and weed.  Water is easily available; it doesn't even take one hose to reach every bed.  I just can't get over the positive results.  Of course, I still have some maintenance to do: the peas and tomatoes desperately need better supports before much longer, but I think this year really will be the year of successful gardening which just snowballs from here.

Here are some pictures!

This is a photo of our raised beds back in the end of April before any planting began.  The photo was actually to show how high the river was during the big flood we had on the 27th, but the raised beds had a cameo appearance.

Here it is today!

Here are some close ups of my broccoli and lettuce:


My tomato plants are looking great and in desperate need of additional supports.


Next door to the tomatoes are the celery, cucumbers and peas

Followed by the beans and summer squash


And finally we've got the mustard greens with the carrots, and the acorn squash.


Hope you folks are having a great gardening year as well!  Stay tuned for some great shots of the kitchen progress and more baby goats!!

Kidding season has begun!

Lovingly Posted by Melissa Wednesday, June 15, 2011 1 comments

So anyone who knows about raising goats is probably laughing right now because it is a LITTLE bit late in the season for kidding.  But hey, you do what you can, right?  We bred our goats late because I wanted some adjustment time after bringing our daughter into the world before I wanted to think about milking goats.  So here we are.

Jokers Wild certainly threw some good kids our way and we couldn't be more pleased thus far.  A week ago we had a major heat wave and I was holed up in the house with Isabel working away.  Kyle got home around 4:30 and announces that we have baby goats!  I knew a few of our does were close, their tail ligaments were getting softer by the day, but I was surprised to hear that one of them kidded without me noticing.  We hopped outside, which was a shock to my system because it was almost twenty degrees hotter that the house, and found Juniper in the shade of a few trees with two tiny babies by her side.  They were already dry and wobbling around.  They are two little bucklings, both tri-colored and I think we're going to be keeping one for breeding.  My husband has already named them Rootbeer and Moxie.


Not two days later my darling May graced us with the arrival of a doeling as well!  I saw her udder was getting bigger and her ligaments were almost gone but she fooled me last year so I wasn't holding my breath on her.  Well, apparently good things DO come to those who wait.  Not only did May produce a beautiful and friendly little girl but she also has a GREAT big udder and fairly large teats.  Pretty impressive for a first freshener I think.  I made my first attempt at milking her just this morning and while I wouldn't say it was easy it certainly went much smoother than any of my attempts last year at milking Chutney.  So I'm excited and hopeful.


Poppy was the third so far to kid this year.  Two days after May's doeling was born, Poppy produced a doeling of her own.  She looks just like Joker and is just a tiny little thing.  Poppy is our smallest goat so I'm not sure how successfully I will be able to milk her, but I'm hoping to do a bit with her and Juniper this year so they'll have an easier time of it next year.  If we could just get enough milk to avoid buying any for Kyle's coffee or my goat cheese addiction then it will be worth the effort.


Still left to kid are Chutney and Willow.  Chutney is looking just as big as last year and her ligaments are hard as rock so I'm thinking she'll give us at least three kids again this year.  Time will tell.  So as it stands we're up to four kids.  The little bucklings were disbudded last night and the doelings will be done before the end of the week.  I'm still waiting for their little nubs to come up.

Things are moving along in other areas of the farm as well.  Our pigs and chicks are growing fast over the pasture, the garden is doing well, the bees (I am very sorry to report) didn't make it through the winter so we're going to wait and try again next year.  I will be trying to blog more often now that we have so very much going on.  I would hate to get too far behind when there is stuff to report on!  Thanks for sticking around, folks!

Another month has passed

Lovingly Posted by Melissa Wednesday, March 30, 2011 1 comments

Again, another month has flown by in what seems like just one long, deep breath.  I am guilty of wishing away the remains of winter and dreaming daily of the promise of green.  We are lucky in that we have enough exposure that the sun has melted away a good portion of the snow around our house and we've been seeing the beginnings of my *shhhhhh* spring flowers.

Although living in northern Vermont means you have to have quite a bit of patience and a BIG sense of humor.  Sure, the calendar says its spring but we're due to get another Nor'easter this weekend.  Whoever coined the phrase about March with it's lions and lambs surely didn't live in Vermont.  Not that this is much of a surprise, last year there was quite a storm up here on Mothers Day.  You just never know.

Things here on the homestead have been idling since the addition of our daughter.  But plans are always in the backs of our minds and soon enough we'll be jumping into action again.  We are beginning to recognize that although we have the best intentions, sometimes we jump a little too hard with our ideas.  So this year we plan on focusing on the motto: small but successful.  This translates into smaller gardens that we can rely on to AT LEAST provide us with the staples to make Isabel's baby food when she begins solids later this summer/fall.  We're still planning on raising chickens and pigs to feed our family but this year we're planning on three pigs instead of four and a few smaller batches of meat birds instead of one big lot of them that would all need to be processed at about the same time.

We're toying with the idea of stepping back from the dairy goats for now as well.  We'll see how milking goes this spring/summer, but at the present they are relatively expensive pets.

We have some plans for better broiler production.  Last year, we kept them with our laying hens and about half of them jumped the fence into the pigs' pasture, becoming supplemental protein.  This was a major disappointment so this year we're planning on making some inexpensive chicken tractors similar to Joel Salatin's (approximately 10'x12'x2') so we can keep them on the lower pasture where they will get plenty of grass yet still be safe from predators (both domestic and feral).

Speaking of which, we had a major loss last month.  Some unfamiliar dogs paid us a visit and much to our dismay they killed off half of our laying hens.  Then, thanks to the pile of dead chickens that we probably should have just processed and turned into dog food, we attracted a fox and some weasels.  We lost another two or three chickens and are now down to just over a dozen.  To top it all off we have at least one weasel living IN our barn.  We see it every time we go out to feed the goats and the chickens.  Needless to say, we have pulled out the .22 and are going to borrow a livetrap from my brother and sister-in-law.

So, that is where we're at.  I'm going to be pulling out the leftover seeds from last year so we can take stock and see what needs to be purchased for this year.  I'm hoping to get some of our seeds started this weekend. But, in an up coming post I am hoping to detail our plans for food production in a little bit more detail.  Thanks for sticking with me folks!

The Senesac Family Has Grown!

Lovingly Posted by Melissa Monday, February 21, 2011 4 comments

Do you know what happened the day after my last post?

No?

Ok, well then I'll tell you.  I had a baby.  Yep.  Our little girl who wasn't due for another couple weeks decided to show her face early!  I had spent the entire day out and about with my Mom.  We did some fabric shopping, went out to lunch, and then I had a variety of doctors appointments over in Burlington.  By the time I got home my ankles had swollen a bit and I was so tired I decided to take a nice hot bath before going to bed.  Kyle and I hit the sack at 9 o'clock and not ten minutes later my water broke.  So, we rushed to the nearest hospital (our local place where we had originally planned on a natural birth with the midwives there) just in case I had a prolapsed umbilical cord since my little peanut was breech.  But, thank goodness, all was well with the baby when we arrived.  Because I was having contractions and things were progressing so fast they decided to keep me there for the c-section rather than sending us via ambulance to the hospital in Burlington.

Two hours after we had arrived at Copley hospital we had a baby.  She was born on 1/11/2011 at 11:27pm.  We spent four days in the hospital recovering before heading home on Saturday.  The past month has gone by in a flash and in just another couple weeks I'll be going back to working part-time which will be an adjustment.  But parenthood is wonderful.  Our baby girl is healthy, happy, and is growing like a weed.

So, without further ado, please meet the latest member of the family: Isabel.

Our Hearth- Part 2 and Part 3

Lovingly Posted by Melissa Monday, January 10, 2011 0 comments

Can I say 'wow' for just a minute here.  I thought I had published this post months ago but to my horror, when I went to write a post about the recent updates to our hearth, I rediscovered it.  So, please forgive the delay- I will promptly remedy that plus add the most recent updates as well.  Prepare yourself for one bear of a post.

One Sunday morning back in the middle of September, we were heading to the Tunbridge Fair and wanted to be sure and get our hearth pad finished so it would have plenty of time to set before placing the 450 lb wood stove on it come Friday evening.  We mixed the first batch of thinset, approximately the viscosity of clay (with heavy stones you want to be sure not to mix it too thin or it will all just get smooshed out before you can set and level it), and let it sit for 5-10 minutes as instructed by the directions on the bag.  While it was sitting we went out to the barn to feed the girls.

We returned to the thinset, Kyle gave it a final, quick stir and we went inside to get down to business.  As I am the resident tiling expert (having tiled our bathroom floor with the help of my Mom apparently makes me the expert *sarcasm*) I was delegated to applying the thinset to the cement board.  I put it on thick, as I mentioned before, these stones are heavy and we wanted to be sure to have enough thinset below the stones to have "wiggle room" to be sure it was perfectly level.  Once I had it spread out a bit to be sure it would reach all the corners, Kyle laid down the stone.  This is where the painstaking process of leveling the stone came into play.  Kyle literally stood on the stone and jumped up and down until the thinset oozed out the sides and corners and would jump on certain areas depending on which side needed to be lowered to level it out.

*I'm sure most seasoned masons wouldn't recommend this course of action, but as we had no rubber mallets on hand (not sure if that would have even worked really) and no other/better ideas, that is the way we went.*

Once the first stone was set in place and the excess thinset wisked away from the edges (it was a constant battle to keep the floor and the faces of the stones "cleanish" during this process) we moved on to setting the next stone.  Because these stones were a little irregular we had to be sure that they were not only level, but at the same height as well.  It took some finessing, but we ended up with a great finished product.  We were sure to clean out between the stones where we'll be putting grout and we washed the tops of the stones one last time before calling it quits for the day.

After we let the thinset cure for a few days we went back to work.  We filled in the spaces between the stone with dark gray grout and took out the door behind the hearth.  We needed to get some cement board up to support the tile we would eventually put up.


Getting the stove and chimney installed took a little longer than we had anticipated.  It seemed like every time we had a date scheduled with the guy doing the install, it would inevitably rain that day, causing further delay.  But, after a couple days of clear weather we had a fully installed wood stove ready to go.

We left it like this for a couple months before actually tackling the project again.  After all, we did have the dining room renovation to tackle as well, and as that was more of an eyesore it had higher priority.  But, the end of November found us back at the hearth.

My father and step-mom came up for Thanksgiving and it seems like every time they stay with us my hubby and dad tackle some sort of project together.  This time they got to work on a mantel.  Yep, thats right, we don't have a fireplace but we DO have a mantel.  It might sound like an odd combination, but trust me, it was exactly what was needed on that wall to keep it interesting behind the wood stove.  Kyle had a bunch of wood in the workshop that he had salvaged from around our house so the project took nothing but time and a little bit of stain and urethane we already had!


Despite how it looks in this picture, the mantel really IS level...I didn't realize my picture-taking mistake until just now- oops!

We lived with it just like this for a few weeks, maybe even a full month before we got around to dealing with the tile.  My mom and step-dad came down a couple weeks ago to help out.  We had a few days of warm weather where we felt alright about taking the stove out of commission and using our furnace in order to allow the thinset and grout to set well without drying out too quickly.  Kyle was off to his sister's house for yet another Christmas celebration (we average around 5 or 6) and as I am officially done riding around in the car unless absolutely necessary I skipped out and supervised the tiling instead.

A few hours and some head-scratching later (there were some small irregularities to the cement board due to the spacers behind it that wreaked some havoc for a tile or two- after whittling away at it a bit we were able to continue on) all the tile was up and looking gorgeous.  Kyle took care of the grout a couple days later.  The only thing left to do is to put up some wood trim around the bluestone hearth pad, and around the inside of the mantel where it meets the tile.  We also need to tackle the wall above the mantel at some point, but I think we have agreed that we'd like to paint it some sort of accent color instead of doing more tile to keep it looking really special.  I'm leaning towards a rust color that would bring out some of the brownish reds in some of the slate that we put up.  But we shall see.

So, without further ado, I present to you our "finished" product:


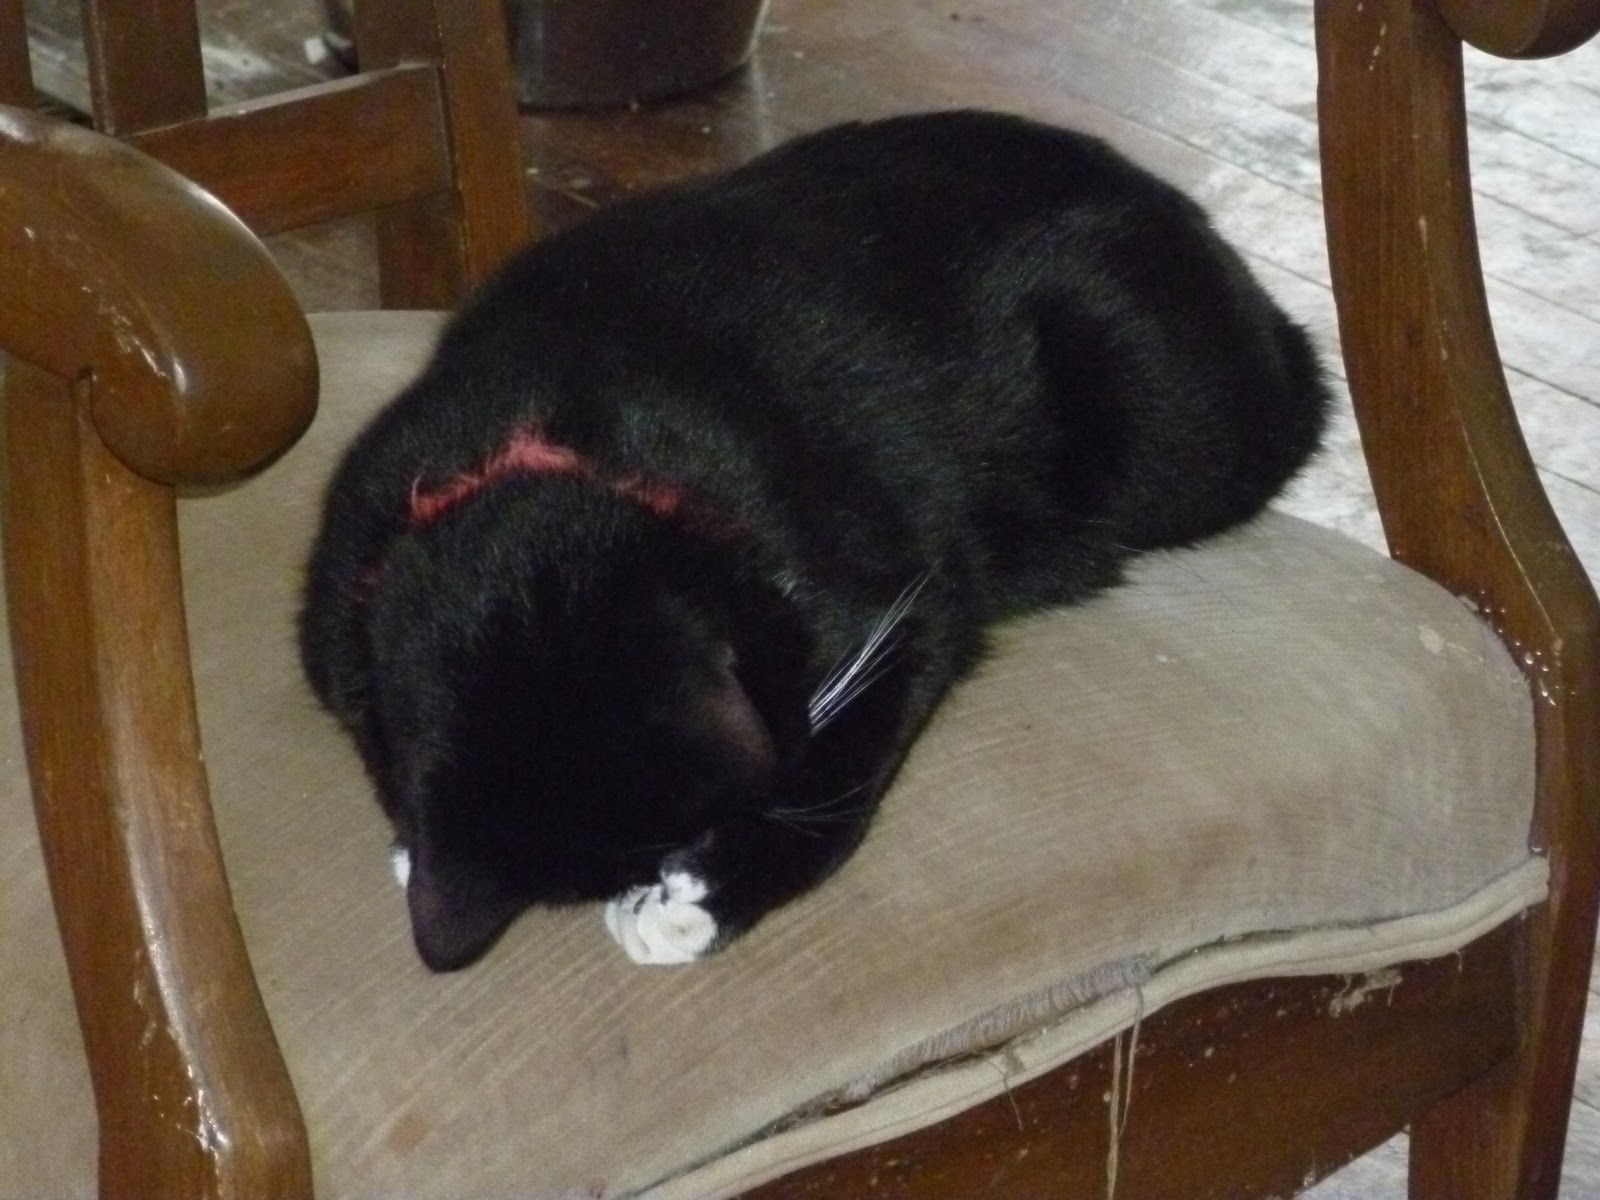
Pretty sweet, don't you think?  And in case you didn't notice, we're not the only ones enjoying our wood stove.  Yep, the cats LOVE to lay in the rocking chair we have in front of it.  This is Atticus taking a nap- I think the stove was a little hot so he had to cover his face...hence the "no pictures please" pose.


Our Guest Bedroom: The End

Lovingly Posted by Melissa Tuesday, December 14, 2010 1 comments

Well, this is probably THE most overdue update as it stands today.  Our guest bedroom has been finished for almost a year now.  You may recall that we had to gut the room over a year ago due to some rotten studs we found in the walls when we replaced the old windows.  While we were at it we decided to move a wall so we'd be able to have a closet in the room instead of at the end of a narrow little hallway, which was detailed in this post if you'd like to re-live the action.  Things progressed slowly but steadily and we were so happy when we were able to finish it up and have a comfortable room for when we had family or friends stay over.

In celebration of our finished room, I'd love to present you with the before and after photos that I've been holding on to for so long.  So, here we go!

Back in February of 2009, we closed on our house and immediately got to work.  I recall that evening very clearly, it had been snowing and the roads were greasy.  We hit a pothole the size of my car and lost a couple hub caps but that couldn't dampen our spirits; we had just bought our first home.  When we arrived at the house we went upstairs and started ripping down wallpaper and tearing up flooring in the largest of the four rooms.  We had intended that this room be our master bedroom but changed our minds after realizing that the back of the house had less noise from the road.

This is what the guest bedroom looked like back when we moved in.  Complete with two low, cracked windows, layers of peeling wallpaper on the walls and ceiling, Congoleum on the floors, and a bare light dangling from a ten foot long cord.


After we got our hands on it we managed to update the wiring (which was done by a professional), re-insulate the walls, replace the windows, refinish the wide pine boards that were painted and hidden below the Congoleum, move a wall to not only create more floor space but provide a small walk-in closet in the room, install a ceiling fan light fixture, and paint.  We're pretty happy with the result.  Take a look.


As you can see, Kyle had created a small built-in shelf/cabinet next to the closet which has added a lot of character to the room.  Also, we found that if we hung the curtains from just below the ceiling we could trick the eye into thinking the windows were taller than they really are.  It also makes the ceiling feel higher.  We could still use some decoration on the walls, some pictures perhaps, but other than that we're pretty happy with the finished product.

So, there you have it folks!  The first room we ever finished in our house!  Still to come is the final before and after of our master bedroom and the nursery.  Stay tuned!

I'm Still Here

Lovingly Posted by Melissa Monday, December 6, 2010 3 comments

I have to thank you all for sticking around during my almost 2 month absence here on the blog.  I have no good excuse, and I hope to get back into writing regularly again now that I'm "back".  So, in my ridiculous effort to get you all caught up as to whats going on here at the Senesac Family Homestead, I give you this blog post- which will be the first of many long-overdue updates.  Bear with me.


The end of October brought a flurry of activity with the pending baby shower paired with the dining room renovation.  As the party was to be at our house (as we are rather centrally located for our family members) we wanted to be sure we didn't have bare sheet rock welcoming our guests into our house.  So, in the week and a half leading up to the shower Kyle tackled the taping and mudding of the sheet rock.  Instead of our typical technique of hand-sanding the seams, Kyle (in a stroke of brilliance, I swear) decided to pull out his orbital sander.  We were sure to put up plastic in all the doorways to try to keep the drywall dust migration to a minimum which worked relatively well.  The walls and ceilings ended up looking great- much smoother than when we would sand by hand- so we're sold on the new technique.

The weekend before the shower we had my Mom come down to help paint.  We purchased a VOC-free paint from the local hardware store in a dusty yellow-green color (can you tell we're suckers for green?).  We were able to get the entire room primed and painted in a single day.  I was psyched.  The room went from this:


To this:
*the paint is still a little wet in these photos so the walls look a little less than stellar*


Rest assured, nothing ever goes perfectly.  We ran into a little comic relief towards the end of the day when my Mom decided to be a joker and step into the paint can.  She says it was by accident but I'm pretty sure she just liked the color and thought her shoes could use a little update.  But a little bit of water and some uncontrollable laughter solved the problem and we quickly righted her shoe and sock, although I'm fairly sure her pants will never be quite the same again.


The floor still needs to be refinished and we have yet to find the perfect chandelier, but we've been making due with the light we removed from the nursery when we upgraded it a few months ago.  We were able to get the trim up and painted around all the doors and windows, so our dining room was perfectly presentable in time for our first baby shower at the end of October.  We had a lovely time with family and friends and were given many generous gifts in preparation for our little girl.

Speaking of which, our little girl (as it turns out) isn't all that little.  She's a little monster in there and the doctors are telling me that if she doesn't flip over soon (as she is currently head UP instead of head DOWN like she's supposed to be) they'll have to schedule me for a cesarean section.  I'm not terribly pleased, what with my feelings of wanting to keep things as natural and drug-free as absolutely possible, but in the end all that matters is that we are blessed with a healthy baby girl in late January.  Until then, I am blessed by being able to stay home, relax, and prepare for baby.  Almost a month ago, the doctors decided that I should stop working and thanks to my company's short-term disability plan we are able to afford this turn of events.

So, thats my modest update for today.  Please stick around- I hope to get another blog post up tomorrow to continue in my efforts to get you all caught up before the end of the year!

Our Renovation Weekend

Lovingly Posted by Melissa Thursday, October 21, 2010 3 comments

We were all geared up to get some work done on the house this past Saturday.  My Mom was coming down from Montgomery to help me with a bunch of little odds and ends in the rooms on our second floor, while Kyle was ready to really tackle the sheetrock in the dining room.  He had been whittling away at it through the end of the week, and was excited (if anyone can really be excited about hanging sheetrock) to have a full weekend to devote to covering the bare walls.

I was a little bummed to miss out on gathering drops over at Shelburne Orchards, but with time running out before the end of the year and baby getting bigger by the day, I was happy to help finish up some rooms.  Most of the upstairs (except for the hallway/stairwell) was finished for all intents and purposes.  So I hashed out a list of things to do in each room to keep my Mom and I busy.  We started in the guest bedroom, where the room has been mostly finished for the past year or so.  After installing a switch plate cover to the light switch in the closet, a door stop, and the hardware for the doors to the built-in cabinet Kyle made, we were finished.  One room down, three to go.

We moved on to the master bedroom which also needed a door stop as well as a second coat of paint on some of the trim.  We also hung a shelf on one of the walls, where I like to keep a mirror and some candles.  The closet also got a bit of an upgrade with the installation of some simple lights that we got from Ikea last month.  Two rooms down, two to go.

The nursery didn't need much that we could do (Kyle still had to install the new window to replace the broken, single-pane one) but we put on a coat of paint on the trim, attached the changing pad to the top of the refinished dresser, and installed a new light to replace the ugly brown one that had been plaguing the ceiling for the past couple of years.  We still need to get the dimmer switch installed but we weren't ready to cut the power to do that- so we left it for Kyle.

Finally, the bathroom has been sitting unfinished for...well, I honestly don't remember the last time we touched the bathroom.  I guess it was this past spring.  But with an additional coat of paint on the trim and wainscoting it was looking a little closer to being done.  We took the hooks off the back of the door so I could get up the towel bar (the old hooks were not only UGLY, but kind of dangerous if you ask me) and put a fresh coat of white paint on the door as well.

While we were toiling away upstairs Kyle was busy in the dining room, he managed to get the majority of the sheetrock finished, except for a few sheets on the ceiling that he finished hanging last night.  Things are really starting to come together in there.


I'll snap some more photos of the dining room tonight, because there really is such a difference having all the sheetrock up and the place cleaned up a bit.  But you get the general idea.

You may have noticed in the first picture a sneak peak of the kitchen.  We had been commenting earlier in the day about how awful it was going to be looking at the kitchen when the dining room is going to look so nice.  The kitchen, covered in layers of wallpaper, or just bits of primed sheetrock from when we had the new wiring installed, looked absolutely terrible.  It didn't help that the cabinets and the trim were painted some shade of aqua blue/green- not my favorite- with some stenciling in a dark green and even some stickers on the tops of the cabinets!  My darling Mother commented that we could throw a coat of paint on the walls and the trim that you can see through the doorway from the dining room just to get us by for now.

GREAT idea.

We primed the bench, the trim, and the walls before calling it a day.  I tackled the rest on Sunday, excited at the prospect of never having to look at the terrible color on the cabinets again.  I primed all the cabinets and threw a coat of paint on the walls that we had leftover from our bathroom renovation.  The color in these "After" pictures isn't quite true, the paint is actually a lot lighter and even a bit more yellow- but thats what I get for using a cheap point-and-shoot camera with no editing.  So, we'll all just have to make due.  So, without further ado, here is a brief 'before and after' of our kitchen.

Before (when we actually bought the house):

The horrible white appliance you see in this picture is actually a second freezer.  Our house came with two freezers, but no refridgerator.  We purchased a new one after we moved in, and placed it on a different wall, in hopes that someday we will open up the doorway a bit more.


After!


Apologies that the pictures aren't of the exact same views, but you get the idea.  =]  We still need to get a coat or two of paint on the cabinets (primer doesn't wash very well), and I'm going to spraypaint the plastic handles on all the doors/drawers to get us by until we can really renovate this room.  Maybe we'll get to that this weekend (the finishing touches, not the full renovation).  We shall see.

So thats the skinny, folks.  Like I said, I'll try to snap some more pictures tonight, I still have a long way to go in catching you up on all the 'before and after' pictures in the bedrooms and bathroom upstairs.  So stay tuned!!

What a weekend!

Lovingly Posted by Melissa Monday, October 18, 2010 0 comments

Holy cow were we busy this past weekend!!  The weather was so terrible it kept us from partaking in our "apple weekend" a la last year's but we were able to tackle so many projects, big and small, on the house (thanks to my Mom, for helping with all the little odds and ends!).  I'm so excited to share with you what we've been doing and I just can't believe how motivated my dear husband has been.  He's a machine I tell ya.

So, that being said, I haven't prepared any pictures yet so this is more of a little teaser.  No pictures, nothin.  But I promise to be back soon with a full update and some amazing pictures of whats been going on.  So, until tomorrow my friends!

| edit post

My Favorite Renovation Project to Date.

Lovingly Posted by Melissa Wednesday, October 13, 2010 2 comments

For almost two years we've been dealing with a minor inconvenience regarding our house.  When you look at it from the road you see a total of three doors: one to the main part of the house, one to the addition, and one to the work shop.  Do you know how many doors you see when you look at the house from the back?  Zero.  Yep, our lovely, long house didn't have a single door leading straight to the back yard.  I'm only a little ashamed to admit that this kept us from spending more time back there.  In reality, when you're as busy as we are, the long walk around the house to the back yard was enough of an inconvenience to keep us from bothering with it.  So for the past year and a half we've talked about installing a nice sliding glass door in the back of the house in our dining room.

As we have been renovating the dining room for the past month or so we decided it was now or never.  We had originally planned to pay someone more experienced to install it for us but, as time was running out as quickly as our "excess" income, Kyle took one look at the exposed wall and thought to himself "I can do this".  That, paired with a free door that was salvaged from my Mom's house, was enough to get us jumpstarted into this long-anticipated project.


A few weeks ago, Kyle began work first thing in the morning.  We wanted to be sure to get as much done on Saturday because the weather report for Sunday wasn't quite as dry.  He measured the door no less than three times and marked the studs where he would have to cut and install a new header.  Because our floor in the dining room is a little slanted (this side of the house was an addition and the foundation wasn't perfectly in line with the old foundation) we had to be sure to make a level base to rest the door on as well.

After all the measurements were made, Kyle cut and removed the studs.  We quickly cleaned out around the work area and he put the new header in place which would be positioned just a little above the door frame.


Once the header and supporting studs were in, leveled, and solid we moved on to the scariest part: cutting the hole in the back of our house. 


This would the be one of the scariest things we have ever done, in my opinion.  Kyle was great, wore his safety goggles and everything, and using the reciprocating saw he managed to cut through the layers of siding relatively quickly.


Here is the ever-victorious man himself.  Champion of demolition.  Master of Sawsall. 

Ok, so once the hole was in the wall we had to quickly move on to the next most crucial part: installing the door itself.  We put it in place and started putting in shims on every side.  As we went we were sure everything was level and square- otherwise the door wouldn't be able to slide properly!  Luckily, the door had a great frame already on it so it was fairly easy for it to keep it's proper shape and before we knew it, the door was in!  We screwed it in place, put in the doors, and stepped back to admire our new view.


Pretty sweet if I do say so myself.  Later that afternoon we filled all the gaps with spray foam insulation designed for windows and doors (so as to not warp the frame with its pressure when it expands) and sealed all small cracks with silicone.  We also capped off the ends of the vinyl siding with special j-groove trim to keep the edges clean and rain water diverted away from the house and put up some lovely new trim around the door.  The door works like a charm and I L.O.V.E. it!! 

Stay tuned my friends, we've got a bunch more stuff in the works and the dining room renovation is in full swing!  Yahoo!

A Welcomed Addition to the Farm

Lovingly Posted by Melissa Monday, October 11, 2010 2 comments

Hi folks!

We've just been in a whirlwind of activity the past month or so and I am falling desperately behind on posting about our home renovations.  Progress is being made and I'm excited to share pictures with you.  I'm hoping to get a few posts up this week regarding the hearth pad and the dining room especially.  But as I still need to upload some pictures I won't be able to get to those topics today.  Instead, I just want to make quick introduction.

Blog friends and family, we are pleased to announce our newest addition to the farm, one that will enable us to keep pushing forward in our dreams of becoming self-sufficient.

Image and video hosting by TinyPic


This, my dear friends, is NC PromisedLand Jokers Wild, who has come to us from our favorite Nigerian Dwarf Goat breeder, Sharon at Willow Moon Farm.  Joker is the first male to be welcomed to our farm on a permanent basis- he'll be servicing our does in the months to come.  As our girls are not quite ready to be bred, the younger ones especially, we're keeping this sweet little guy up at my Mom's house with her eight wethers where he has plenty of company and generally stays out of trouble.  Once we have our buck house built and a buckling born on the farm we'll be able officially welcome him home.

Image and video hosting by TinyPic

Isn't he just the cutest?  Ok, so he'll be one big stud muffin in a couple more months but until then I'm going to call him "cute".  This little guy will enable us to breed all our girls later this fall and winter so we'll be milking five does next year.  This should provide our family with plenty of milk and I hope to start dabbling in cheese making and bit of goat's milk soap.

But this is just the start, stay tuned for all the excitement to come!

Dining Renovation- Part 1

Lovingly Posted by Melissa Tuesday, September 28, 2010 0 comments

A couple weeks ago, demolition of our house moved to a whole new level, literally.  We are getting ready to install our woodstove in a couple weeks which means we have to prepare walls and a hearth.  Piggie-backing that project is the renovation of our dining room.  So, after stopping over at Johnson Farm and Garden for some chicken feed and a quick dinner of veggies and beans with spinach gnocchi, Kyle broke out the reciprocating saw and crow bar and got to work on the wall dividing our dining room from our living room.


*This is a picture of our dining room as it was when we bought the house back in February of 2009- we had since torn up the carpet and stained the hardwood flooring that was revealed below.*

I was quarantined to either the yard or our bedroom because who really knows what could be lurking in those walls, and we don't want to risk the health of our baby.  Kyle donned one of our ventilator masks, hung up some plastic in an effort to keep the dust corralled, and within a couple hours he had successfully opened up the space.  We were shocked to find out that the studs within that wall were there purely to aid in the hanging of the lath and plaster.  Thats right, there was no header supporting the floor above.  You really never know what you're going to find in old houses, and this one has really taken the cake so far.

Kyle removed those few studs last week (since they weren't structural there was no need to keep them) so we could get working on our hearth pad and the wall behind where our woodstove will go and moved the outlet and switch to a new wall so we could hook the power back up.  Then the fun began- I watched as my husband gleefully ripped down the drop ceiling that we've hated ever since we moved in.  Who puts a drop ceiling and a flourescent light in a dining room!?  He uncovered the handiwork of our electrician and got a good look at the condition of the plaster and lath ceiling- it looked like crap, but still an improvement if you ask me! 


Last weekend he moved the wiring off of the ceiling and disconnected a few lines to outlets we didn't need right now.  And the demo officially began.  We hired out a local guy to help Kyle with ripping down the plaster and lath since I would be no help at all.  Luckily, in the stripping of the ceiling, they uncovered a massive header where the house originally ended and the new addition began.  So it wasn't just hanging there in space as we originally imagined.  Kyle and Saul we able to get the rest of the plaster and lath stripped by the end of last week and we were finally able to clean up and remove the plastic sheeting (trust me, walking outside to get to the kitchen was getting REAL old).

Over this past weekend we took on a project that we had originally planned on paying someone to do.  We drove up to Montgomery Friday night to retrieve the sliding glass door from my Mom's house that she no longer wanted and set our eyes on getting it installed by the end of the weekend.  We had three doors in the front of our long house but no doors going out to the back yard.  We've been wanting to get a door installed so we could quickly and easily get to the back yard and the garden below but never got around to getting quotes for the installation.  Last week Kyle decided he wanted to tackle it himself and I, the ever-supportive wife, went along for the ride.  I'll fill you in on that one next time.